We just finished my son's Lego Birthday party . Every idea came from
Pinterest! I'm trying to add credits to the original source....if one of my ideas was yours, please let me know so I can give credit where credit is due.
These pictures are in no particular order...
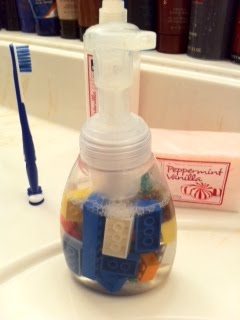
Legos in the soap dispenser. The idea came from
Simply Sara.
Lego Mini Figure Heads. Baby food jars spray painted yellow. Sharpies used to make faces. The kids helped with the faces. Idea from
CraftZine
I found an awesome template for a Lego gift box at
Delia Creates. (I also used her Lego brick sheets, but I didn't take pictures. I used them outside to direct people to our back gate. I cut them in 4x2 size). I printed both on red, blue, yellow, and green cardstock. Unfortunately, they didn't stay closed very well. But the kids loved them anyway.

My Lego Man cake. I got the idea for the cake from
LionessLady. I used 4 boxes of cake. 2 chocolate (shirt and pants) and 2 white (arms, head and feet.) The carving was easy. I enlarged the Lego Man from
Winks and Daisies (I used this pattern for a couple of other things below!) The pants and shirts were easy to cut, but the arms and head took a bit more time. I highly recommend using a crumb coat when making cake! I got information on crumb coats from
Wilton. For the face, I used a piece of black licorice. (The snipped off ends made the eyes.) I had left over red and blue frosting in the freezer from a previous birthday. The shoes were just a combination of the red and blue (mostly blue). For the yellow, I used 2 cans of white frosting and 2 colors of
Wilton gel coloring: Lemon Yellow and Orange. I had my Lego experts (ages 14, 8, and the almost 7 year old birthday boy) if the color was right. I was told, "if it looks like nachos, it's right".
.
Pinata time! I saw several ideas for pinatas, including this one from
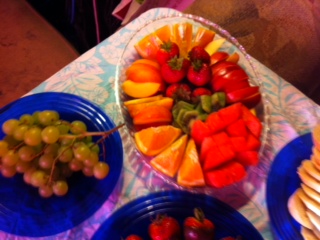
Baballa. I started with a dog food box that the kids painted red. The paint didn't cover the label, so I covered it with red tissue paper. I strung a bungee cord through the handles and glued red Solo cups to the top. All of the kids got a chance to whack it. We ended with the two teenage boys who clobbered it with an aluminum bat. I filled it with fruit snacks (left over from Halloween), assort Lego pieces, and leftovers from the goody bags.
I saw the idea for "Guess how many Legos" on several sites. I used a 20 ounce Gatorade bottle and filled it with various size and shaped Legos. I got 84 pieces in the bottle. The guesses ranged from 29 to 2000! But most were within about 50 of the correct answer. Amazingly, one of the 6 year olds guessed 82: only 2 off the correct number!

I made a box to cover the mailbox. Normally, I put balloons or a ribbon on the mailbox to let guests know where to stop. But when I saw this one at
Like Merchant Ships, I knew I had to try it! I had trouble finding a box big enough to cover the mailbox, but eventually I prevailed. I didn't cut holes like the sample. I pushed the flaps inside the box so I could slide it over the mailbox, and then I covered it with red felt. (Hot glue on the edges). I hot glued red Solo cups on top. Then I printed Aidan's name in the Legothic Type Font. I added characters from the dingbat font Lego System (both downloaded free from somewhere?!?!) When we saw our regular mail carrier across the street, we hurried to put on the box. He pulled up and did a double take as he tried to figure out how to use our new mailbox. We came out and got the mail from him. Aidan told him it was for his party.

My daughter made a Duplo utensil holder that perfectly held the forks and napkins. I got the idea from
Dukes and Duchesses.
I printed several pages of the Lego Man template from
Winks and Daisies. I cut them out and hid them in various places around the back yard. (This one had his arms strung through the strings on the wind chime.)
I printed various coloring pages. Most of them came from the Lego site. But I also found a bunch of Lego Mini figures in the free Lego Party Printable Pack at the
Aussie Pumpkin Patch. I didn't print them out as a book. Instead, I just cut each page in four. I had all of the pictures available for kids to color with markers, pencils and crayons.
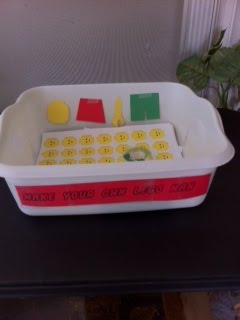
Again, I used the Lego Man from
Winks and Daisies. I cut the pieces out and used them as a template to make a "Build your own Lego Man" center. I used paint chip samples in red, blue, and yellow. I also used scraps of blue, yellow, green and red card stock leftover from the goody boxes and Lego brick sheets. I provided pictures of Lego faces for inspiration.